You finished setup and now you want proof. One test order does it, in about five minutes.
Pick a deliberately bad address
Use your own address with one believable mistake. Good candidates:
- Misspell the street type. “215 Clayton Stret” instead of “215 Clayton St”. Verification recognizes the street and offers the spelled-out fix.
- Use the neighboring ZIP. A real street with a ZIP that’s one digit off gets caught against carrier data, not just format checks.
- Drop your apartment or suite number. If you live in a multi-unit building, leaving the unit off triggers the “Add a unit number?” prompt.
Don’t invent a fully fictional address. A made-up street in a made-up town is undeliverable, which is also worth seeing, but it shows a review prompt with no suggestion. The interesting case is the fixable one.
Place the order
If your store runs Shopify Payments, you can flip on test mode and pay with a test card. Otherwise, place a cheap real order and refund it afterward. Either way the address handling is identical.
Worth saying plainly: a test order is a real order, so it uses one of your first 100 free orders, or costs $0.04 on the Pro plan. That’s the entire price of knowing the app works.
What you should see
On the thank-you page, right after payment, one card appears with the problem explained and the verified fix preselected:
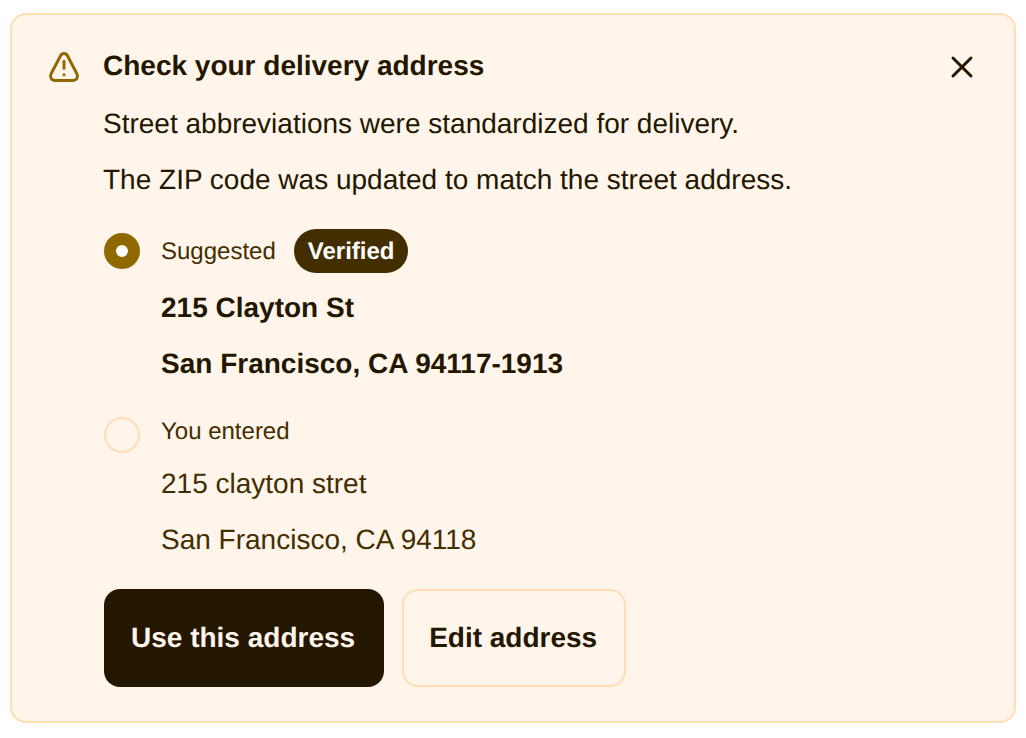
Tap “Use this address” and the card confirms the order was updated. What your buyer sees covers every other state, including the lighter prompts for missing units and automatic formatting fixes.
If you test with a clean address instead, you’ll see nothing at all, by design: the card only renders when there’s something worth saying.
Check the result in your admin
Three places confirm the round trip:
- The order. Open it in Shopify admin: the shipping address shows the corrected version, and the order carries the
address-correctedtag (oraddress-unverifiedif you ignored the prompt). - The dashboard. The Verification card’s “addresses checked” line counts your test, and “Caught by verification” counts the catch.
- The setup guide. Step 2, “Add the block to your thank-you page”, ticks itself off after the first check.
Testing a checkout block
Warn rules never stop checkout, so the test above sails through payment on purpose. To see a hard block, set one rule to Block at checkout on the Rules page (PO Box is the classic), then start a checkout with PO Box 123 as the street. Checkout refuses the address with your message before any payment happens. Set the rule back when you’re done, and note that blocks won’t appear in your dashboard numbers: they’re invisible to analytics by design.